Showing posts with label recipe. Show all posts

Monday, November 17, 2014

Lighter Pumpkin Bread

Aside from all the jokes about pumpkin flavored everything, it really is an essential flavor during the holidays. I'm sure if Family Feud surveyed 100 people and asked, "What is the most popular flavor of fall?" "Pumpkin" would be at the top of the list!

So here I bring you, a recipe for delicious pumpkin bread. This is one of my favorite recipes, AND it's lighter than traditional recipes without sacrificing flavor and texture. :)

The original recipe makes 3 9x13 loaves, but you can make them into muffins, mini loaves, etc. I was able to make 3 mini loaves (which I gave away as gifts) and 6 jumbo muffins.

Lighter Pumpkin Bread (adapted from allrecipes' Pumpkin Bread IV)
Ingredients
(Dry)
2 cups all-purpose flour
1.5 cups whole wheat flour
2 tsp baking soda
1/2 tsp salt
2 tsp ground cinnamon
1/2 tsp ground nutmeg
1/2 tsp ground ginger

(Wet)
1 (15 oz) can pumpkin puree
4 eggs
1 cup canola oil (I used 1/2 cup canola, 1/2 cup melted unrefined coconut oil)
2/3 cup water
2.5 cups white sugar
2 tsp vanilla extract

Directions
1. Preheat oven to 350 °F. Choose your desired pans and prep accordingly.
2. Sift/whisk all the dry ingredients together. Mix all the wet ingredients until smooth. Pour the dry ingredients into the wet and mix until well blended.
3. Pour into prepared pans and bake. Baking time will vary with the type of pans you choose. My jumbo muffins took 28 minutes to bake, and my mini loaves took 38 minutes to bake. Regular muffins will take about 20 minutes, and a 9x5 loaf will take about 45-60 minutes. The best way to test for doneness is to insert a toothpick or skewer into center of the bread, and it comes out clean. Cool and frost if desired.
Drizzled with melted white chocolate + unrefined coconut oil
Jumbo muffins!
These make the perfect gift because they taste even better over the next couple of days! Enjoy :D

Wednesday, October 29, 2014

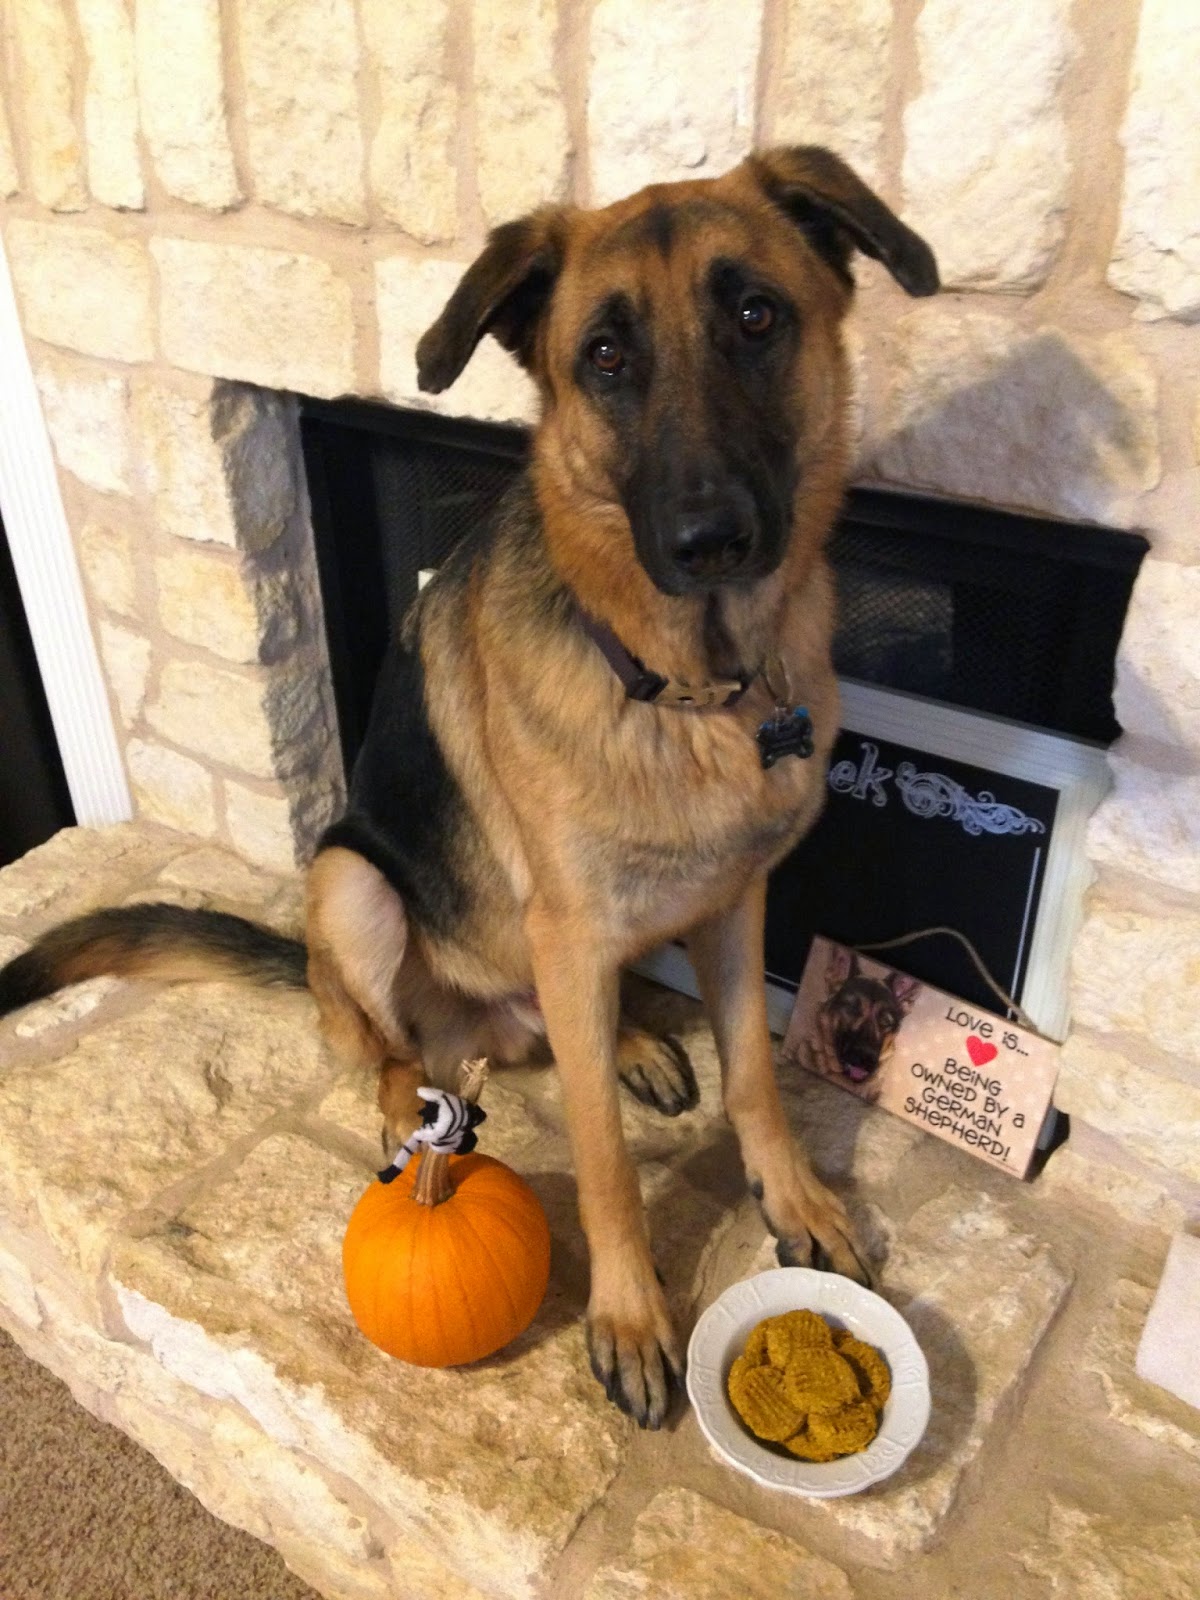
#BasicDog Pumpkin Treats

What's more basic than pumpkin spice anything in the fall? Nothing. Now your dog can also embrace the basicness in a spicy pumpkin treat.

Last week I bought a package of soft dog cookies for about $5, and after a couple of days it was completely finished! Most cookies I buy for my dog are hard and crunchy, but I really like the idea of a softer treat. This recipe I came up with is super duper easy and perfect for the fall.

Brawny and my sister's 2 German Shepherds absolutely loved these cookies. You can eat them too! These are really great to bring along on a hike or long workout as they are filled with fiber and vitamins. They're also very mildly sweet, so don't expect a sugary pumpkin cookie taste!

Soft Pumpkin Dog Cookies (makes ~24)
Ingredients
2 cups oat flour
1 1/2 tsp ground cinnamon
1/4 tsp baking powder
1/2  tsp ground ginger (optional)

3/4 cup canned pumpkin
3 Tbsp coconut oil, melted
4 Tbsp honey


Directions
1. In a large bowl mix together the oat flour, cinnamon, baking powder, and ginger. In a separate bowl, mix together the pumpkin, coconut oil, and honey.
2. Pour the wet mixture into the dry and stir until well combined.
3. Scoop tablespoons of dough onto a parchment-lined cookie sheet and flatten with a fork.
4. Bake for ~15 minutes at 350 F°. (Bake 5-10 minutes longer if you want a firmer cookie).
5. Let cool and store in an airtight container. :)

Pumpkin batter
Cookies before baking
#BasicDog loves his #BasicCookies
Now go make these pumpkin treats! To fully get into character, dress warmly in your leggings and Ugg boots... and don't forget to Instagram the finished product. ;)

Thursday, July 24, 2014

"Healthier" Chocolate Cake

I'm back! It's not that I haven't been baking recently--it's because I haven't been baking really healthy things. Yes, there's a reason why this blog is called "pretty healthy desserts." :

Anyway, I've been up since 2:30 am. Why? I have no idea. I tossed around for about hour and decided to just get up by the time it was 3:30 am.  I ate some food, got caught up on the latest episode of Masterchef, worked on some graduation stuff... then I decided to bake a cake.

This is a very simple, basic "black magic" chocolate cake. I've made black magic cakes before, and they are pretty delicious. I made a few changes to Hershey's popular recipe, and it still turned out delicious! This version has less sugar and less oil. The original recipe also calls for strong coffee...I was lazy and didn't want to make coffee, hah. If you want, just substitute half of the buttermilk for coffee. It brings out the chocolate flavor more.

"Healthier" Chocolate Cake (adapted from Hershey's black magic cake)

Finished cake topped with chocolate, almond butter, and shredded coconut
Ingredients
(Dry)
1 cup all-purpose flour (I used 3/4 cup all-purpose and 1/4 cup whole wheat)
3/4 cup white sugar
1/4 cup cocoa powder
1 tsp baking soda
1/2 tsp baking powder
1/2 tsp salt

(Wet)
1 egg
1 cup buttermilk (you can substitute 1 cup water + 1 Tbsp distilled white vinegar)
1/4 cup canola oil
1 tsp vanilla extract

Directions
1. Preheat oven to 350 °F. Lightly grease a square 8x8 pan (for easier clean-up, line with aluminum foil and then grease)
2. Sift/whisk all the dry ingredients together. Make a well in the center and pour in the wet ingredients. Stir briskly until smooth.
3. Pour into prepared pan and bake for about 25 minutes, or until a toothpick inserted in center comes out clean. Cool and frost if desired.

Chocolate chips melting
I made a "frosting" by topping the cake with chocolate chips right after I pulled it out of the oven. The heat will cause the chocolate to melt. Wait for about half an hour for the cake to cool slightly, then add about 5 big spoonfuls of almond butter to the top; smooth to cover cake. The chocolate & almond butter will combine into one delicious spread. :) I added shredded coconut to the top to make it look more presentable.
Delicious!

My dog staring longingly at what he can't have...
I ate a piece and already want another! I like this cake because it's not too healthy to where it tastes like dry cardboard. :D

Sunday, February 9, 2014

Homemade Chocolate Hazelnut Spread (aka "Nutella")

It was World Nutella Day on February 5th. So in honor of one of the most popular chocolately spreads, I decided to make my own version. Even better than buying it from the store! Easy easy easy and delicious. :)
End product. Chocolately and yummy.
No doubt,  Nutella is pretty addictive. According to their website, it is a "combination of roasted hazelnuts, skim milk and a hint of cocoa." However, looking at the ingredients list, the first couple of ingredients listed are sugar and palm oil. Ehhh... no bueno. I went on a lengthy recipe search for homemade nutella and finally settled on David Lebovitz's version as a basis. I like his version because it uses real chocolate, has no added sugar (except for some honey), and it was the least complicated out of all the recipes I searched. I did make a lot of my own changes to make it even more simple.

Notes: I used a mixture of Ghiradelli's bittersweet chocolate (60% cacao) and Hershey's special dark chocolate chips (45% cacao). A higher percentage of cacao generally means less sugar and a more intense chocolate flavor. My end product was a little too sweet, so next time I will try using chocolate that has at least 60% cacao.

A lot of recipes had instructions to remove the hazelnut skins, but I left them on for texture and to save time.

Also, I used skim milk because that was what I had on hand. I originally used 1 cup of skim milk--it turned out too liquidy, so I had to heat it in a pot to condense the mixture further. (With whole milk, you may need a little more since it is less watery than skim.)

Chocolate Hazelnut Spread 
Ingredients:
1 cup hazelnuts
3/4 cup skim milk
1/2 cup powdered milk
1.5 Tbsp honey
6 oz bittersweet chocolate (you can use different ratios of semi-sweet, dark, milk chocolate etc. depending on how sweet you want the spread to be)

Ingredients
Directions:
1. Spread the hazelnuts evenly on a baking sheet. Toast them for about 8-10 minutes in a 300°F oven, stirring them every 2 minutes until lightly brown. (I first toasted them at 350°F, but they burned too easily! Had to throw out the first batch)

2. Over medium heat, warm the milk, powdered milk, and honey in a small pot. When it begins to boil, remove from heat. Strain the milk mixture to remove any lumps.

3. In a microwave-safe bowl, microwave the chocolate a minute at a time on 50% power, stirring after each minute until smooth.

4. Time to blend! In a food processor (I used a Vitamix), blend the hazelnuts until it's at a very fine, almost paste-like consistency. Scrape the sides of the bowl to make sure all the hazelnuts get blended. 

5. Add in the melted chocolate and continue to blend. Finally, add in the warm milk mixture and blend until smooth and creamy. You can strain the mixture if you want it to be extra smooth, but I like how the hazelnuts add texture.

6. Transfer to a glass jar and refrigerate! 

Additional note: Don't worry if the spread seems liquidy; it will firm up once it's chilled. :) IF it remains liquidy even after refrigeration, you can reheat it in a pot like I did to evaporate some of the moisture.


Pre-toasted hazelnuts
I broke up the Ghiradelli bar into little pieces so they would melt evenly with the chocolate chips
Melted chocolate, strained milk mixture, toasted hazelnuts. Ready for blending!
Hazelnuts in the Vitamix
Adding in the chocolate--you can see how well the hazelnuts are blended
Reheating the mixture until thick and creamy (again, I had originally added 1 cup of skim milk, which was too much)
Enjoying it on some toasted bread with granola on top =]


Tuesday, April 9, 2013

Lighter Chocolate Chip Cookies

Hello, world! I have transitioned from my old blog (which is now private) to this brand new one. :)
I decided to bake “healthier” chocolate chip cookies for my first official baking post. I made a number of changes to a traditional chocolate chip cookie recipe: I reduced the butter by more than half(!), reduced the sugar by 1/3, reduced the amount of chocolate chips, and subbed in some almond flour for the all-purpose flour. I also added some almond milk at the end because I thought the batter looked a bit dry.
Don't they look good?
Izzy’s Lighter Chocolate Chip Cookies 
Ingredients:
·         1 ¾ cup all-purpose flour (I used unbleached)
·         ½ cup almond flour
·         1 tsp baking soda
·         1 tsp salt
·         1 tsp instant coffee powder (optional)
·         6 Tbsp unsalted butter, softened
·         1 cup dark brown sugar
·         1 large egg
·         2 tsp vanilla
·         1 Tbsp water
·         ¼ cup unsweetened almond milk
·         ½ cup semi-sweet chocolate chips

Directions:
1.       Preheat oven to 350°F and cover a cookie sheet with parchment paper.
2.       In a small bowl, sift (or whisk) together the dry ingredients: all-purpose flour, almond flour, baking soda, salt, and instant coffee powder.
3.       In another bowl, blend together the softened butter with the brown sugar. Add in the egg, vanilla extract, water, and almond milk and mix until smooth. Mix in the dry ingredients and stir in chocolate chips.
4.       Drop by tablespoons on prepared baking sheet and bake for 13-15 minutes.  Makes 24 cookies.

Dry ingredients + butter & brown sugar; ready to be popped into the oven!

I even calculated the nutrition facts with this really helpful website: www.nutritiondata.com
Each cookie has about 138 calories. As you can see, it’s not necessarily healthy, but definitely lighter in calories, fat, and sugar than a traditional chocolate chip cookie! (Next time I’d probably incorporate whole wheat flour as well).